To register a PLSQL procedure as concurrent program we have four steps
Step : 1 → Create Executable
Step : 2 → Create concurrent program and link to Executable
Step : 3 → Create Parameters and link Value Sets
Step : 4 → Assign the registered Concurrent Program to a request group
Step : 1 → Create Executable
Concurrent is a program that user will invoke directly from the oracle apps. Imagine that each time to run a package or procedure a customer has to login to his database and running and for that we have to educate the client. Instead of this, registering a concurrent is best method to run the API because user will be assigned to responsibility and then he can run the program. It is a way to deliver to customer.
To register a program as concurrent open Oracle apps and go to the following Navigation
The Navigation is
Login into Oracle Applications –> Go to Application Developer Responsibility –> Concurrent –> Executable
This Executable is for running a program.
FIELDS:
- Executable: This is User Understandable Name
- Short Name: This is Unique and for system reference
- Application: Under which application you want to register this Conc. Program
- Description: Description
- Execution Method: Based on this field, your file has to be placed in respective directory or database.
- Execution File Name: This is the actual Report file name. If you register a PL/SQL Procedure in a package you have to give the packagename.procedure. You don’t need to specify any parameters in procedure here.
Action: Save
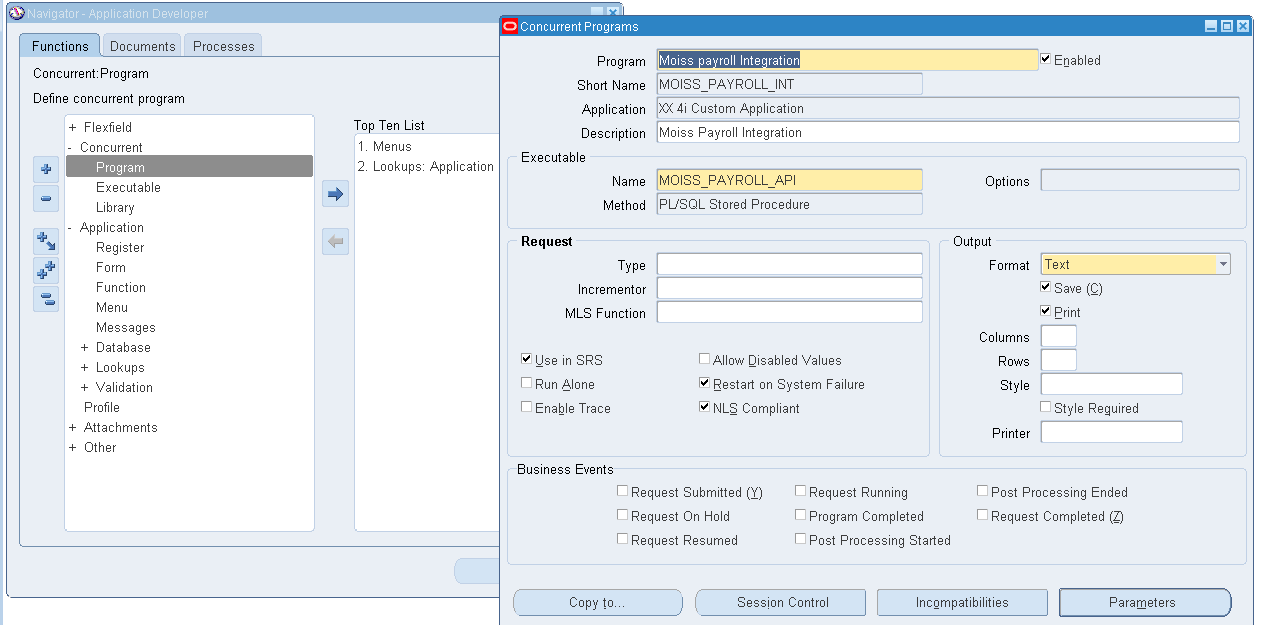
Step : 2 → Create concurrent program and link to Executable
The Navigation is
Application Developer –> Concurrent –> Program
FIELDS:
- Program: User Understandable Program Name
- Short Name: This should be unique name and for system reference
- Application: Enter the application under which you want to register this conc.prog
- Executable Name: Enter the User Understandable Executable Name
- Method: This will be populated automatically from Executable Definition
- Output Format: Select the format of the output you want
- Output Style: Select A4 to print on A4 Paper
- Printer: You can default any printer or you can enter while submitting concurrent program.
Make sure you link the Executable’s short name and Concurrent program’s Executable name.
Step : 3 → Create Parameters and link Value Sets
Create Parameters and it is Better to Create Value Set
To create parameter the Navigation is
Application Developer –> Application –> Validation → Set
There are many types to get List of Values. So I go with the table.
To get data from table,select validation type as table and click the Edit Information Button Enter the Value and ID to be passed.
Linking value set to parameter and the Navigation is
Application Developer –> Concurrent –> Program
Enter the following here. And click on parameters to define parameters and in parameter form you can also enter default type
The above is Example for creating a parameter.
Just observe the below screenshot. Here There is a selection in Enabled. If it is
Checked then the parameter gets enabled and When the Display button is checked we can see the display in Oracle apps concurrent page.We can also give the Default type.
The below is another sample of a parameter. It is better to choose FND_DATE_STANDARD and we have to check for the format. This format is (DD-MON-YYYY)
To Enter a Date and if we are not in need of Value Set
Number : Click on LOV in Value Set and search by typing %Num%
Char : Click on LOV in Value Set and search by typing %CHAR%
DateTime : Click on LOV in Value Set and search by typing %Stan%Date%
Query to Check for Concurrent and the info about the Log file
select cp.plsql_dir, cp.plsql_out, cp.plsql_log
from fnd_concurrent_requests cr, fnd_concurrent_processes cp
where cp.concurrent_process_id = cr.controlling_manager — and cr.request_id = <running request id>
Till now we have created a Executable and Concurrent Program. Now our Objective is to attach inside a request group to run the concurrent.
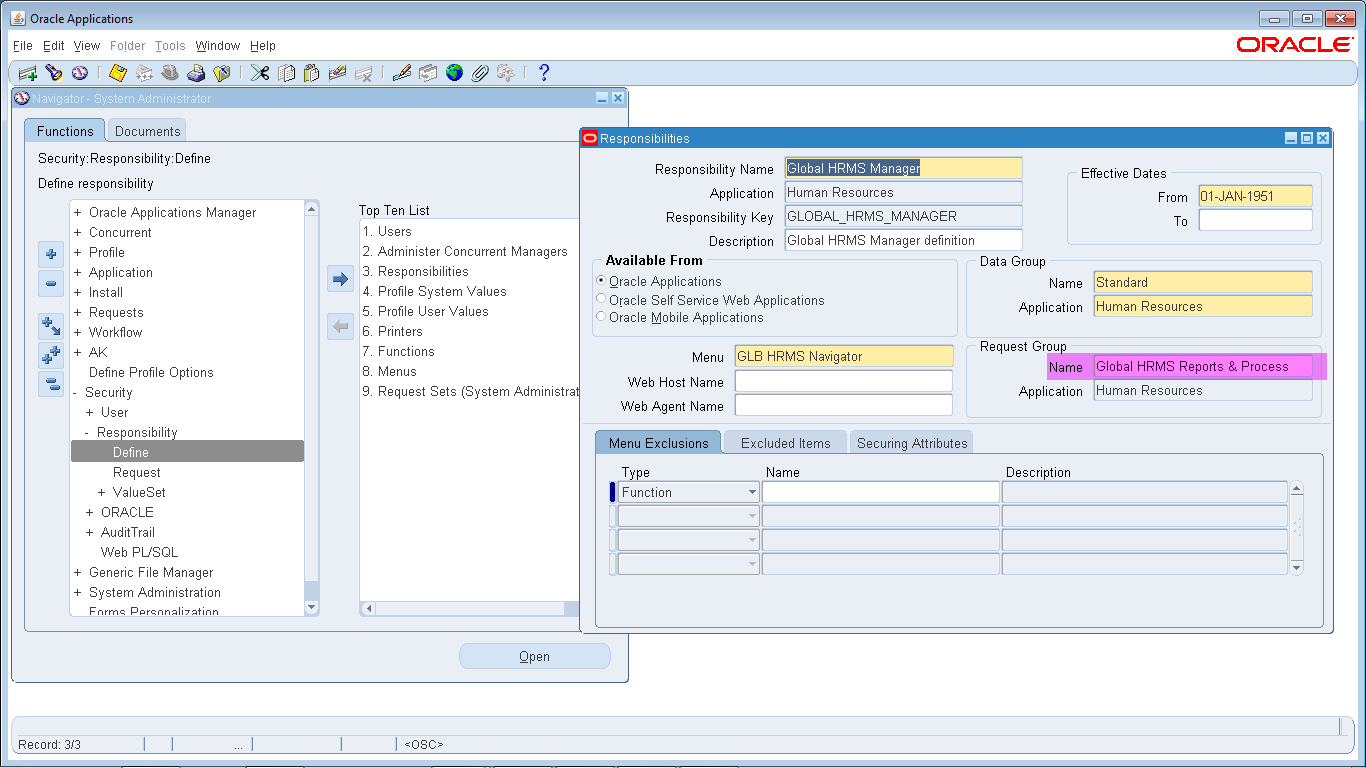
Step : 4 → Assign the registered Concurrent Program to a request group
Now select a responsibility for which the concurrent has to run and that responsibility has the Request set. We have to make sure that we attach the concurrent program to the responsibility. I have chosen the Responsibility as Global HRMS Manager. Now when you query it you will get the Request group as shown in the below screenshot.
The Navigation is
System Administrator –> Security –> Responsibility → Define
Now you have to attach this to a Request Group and make it run.
Get the Request group and attach you concurrent here.
The Navigation is
System Administrator –> Security –> Responsibility → Request
Now go to your Responsibility to run concurrent program.
Note:
When you are using your custom application it may not be in Data group(standard). You may not get it listed while searching in the submit request.
So Just go to the Below Navigation and check the responsibility Data group. In the below screen shot it is above the marking. The mark represents the Request group and top of it si Data group. So if your application is in Data group then you can see in Request Group.
Refer till two below screen shots.
To add to Request group go to the Data group and Query the attached name. In my case it is standard.
Note over
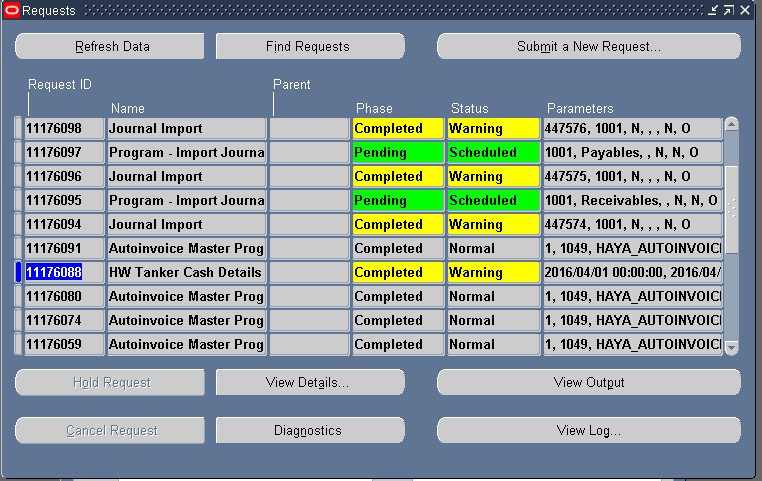
Submit a new Request and run your concurrent. Here you may be prompted the parameter. Just Remember we had three parameters and we disabled the one so now we got two left.
After submission we get the Request Id for our reference.
Now we have our output. We can view the output but ours is a procedure so there will be nothing. But we can view the log whether this program worked or not.